> ## Documentation Index
> Fetch the complete documentation index at: https://help.konfhub.com/llms.txt
> Use this file to discover all available pages before exploring further.
# Creating an Event
> Learn how to sign up, log in, and create your first event on KonfHub.
Creating an event on KonfHub takes less than two minutes. This page walks you through signing up, logging in, and filling in the basic details to get your event up and running.
***
## Step 1: Go to KonfHub
Visit [konfhub.com](https://konfhub.com) and click **Host an Event** in the top navigation.

 If you are not logged in, clicking **Host an Event** will redirect you to the Sign In page automatically.
***
## Step 2: Sign In or Sign Up
### Already have an account? Sign In
On the Sign In page, choose how you want to log in:
If you are not logged in, clicking **Host an Event** will redirect you to the Sign In page automatically.
***
## Step 2: Sign In or Sign Up
### Already have an account? Sign In
On the Sign In page, choose how you want to log in:
 * **Google, Facebook, LinkedIn, or Amazon** - click the respective button for one-click login via your existing account
* **Email + Password** - enter your registered email and password, then click **Sign In**
* **Email OTP** - click **Sign in with Email OTP** to receive a one-time password in your inbox instead of using a password
If you've forgotten your password, click **Forgot Password?** to reset it via email.
### New to KonfHub? Sign Up
If you don't have an account yet, click **Sign Up** at the bottom of the Sign In page.
***
## Step 3: Fill in the Create Event Form
Once signed in, you will be taken to the **Create Event** form. Fill in the following details:
* **Google, Facebook, LinkedIn, or Amazon** - click the respective button for one-click login via your existing account
* **Email + Password** - enter your registered email and password, then click **Sign In**
* **Email OTP** - click **Sign in with Email OTP** to receive a one-time password in your inbox instead of using a password
If you've forgotten your password, click **Forgot Password?** to reset it via email.
### New to KonfHub? Sign Up
If you don't have an account yet, click **Sign Up** at the bottom of the Sign In page.
***
## Step 3: Fill in the Create Event Form
Once signed in, you will be taken to the **Create Event** form. Fill in the following details:
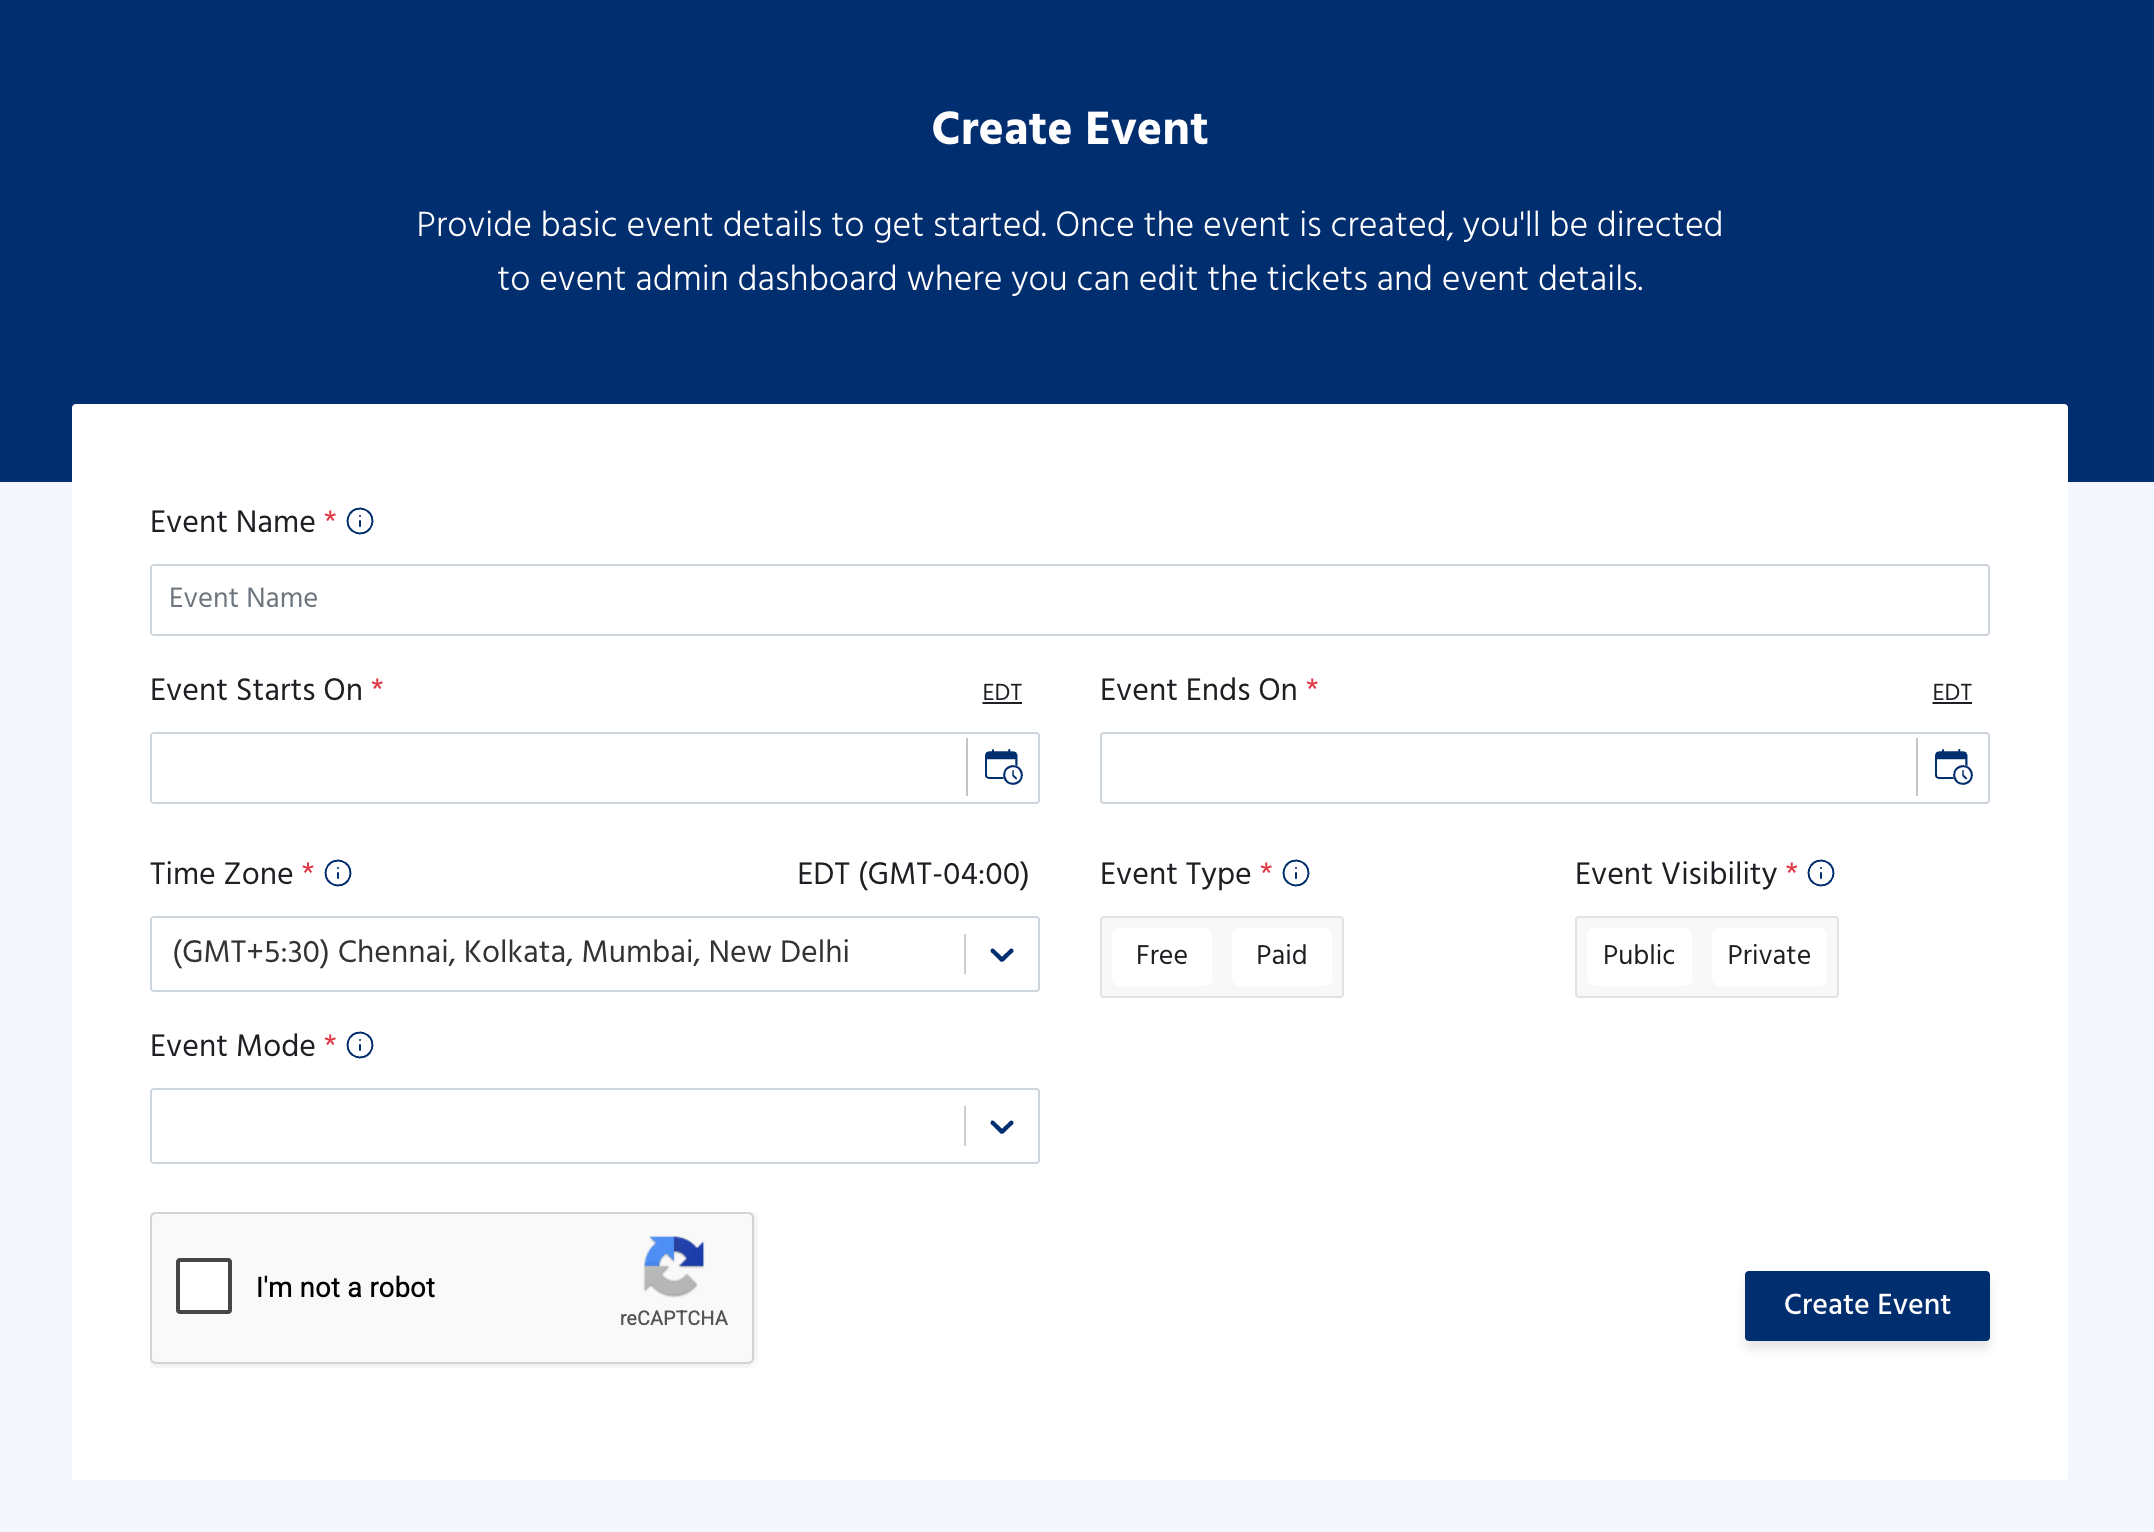 | Field | Description |
| -------------------- | ----------------------------------------------------------------------------------------------------- |
| **Event Name** | The title of your event as it will appear on the event page |
| **Event Starts On** | The date and time your event begins |
| **Event Ends On** | The date and time your event ends |
| **Time Zone** | Select the time zone for your event - defaults to your local time zone |
| **Event Type** | Choose **Free** (no ticket charges) or **Paid** (collect ticket revenue) |
| **Event Visibility** | Choose **Public** (listed on KonfHub and searchable) or **Private** (accessible only via direct link) |
| **Event Mode** | Select whether your event is **In-Person** or **Online** |
Once all fields are filled, check the **I'm not a robot** reCAPTCHA and click **Create Event**.
***
## Step 4: You're In - Welcome to the Event Dashboard
After clicking **Create Event**, you are taken directly to your **Event Dashboard**. This is your central hub for managing everything about your event.
| Field | Description |
| -------------------- | ----------------------------------------------------------------------------------------------------- |
| **Event Name** | The title of your event as it will appear on the event page |
| **Event Starts On** | The date and time your event begins |
| **Event Ends On** | The date and time your event ends |
| **Time Zone** | Select the time zone for your event - defaults to your local time zone |
| **Event Type** | Choose **Free** (no ticket charges) or **Paid** (collect ticket revenue) |
| **Event Visibility** | Choose **Public** (listed on KonfHub and searchable) or **Private** (accessible only via direct link) |
| **Event Mode** | Select whether your event is **In-Person** or **Online** |
Once all fields are filled, check the **I'm not a robot** reCAPTCHA and click **Create Event**.
***
## Step 4: You're In - Welcome to the Event Dashboard
After clicking **Create Event**, you are taken directly to your **Event Dashboard**. This is your central hub for managing everything about your event.
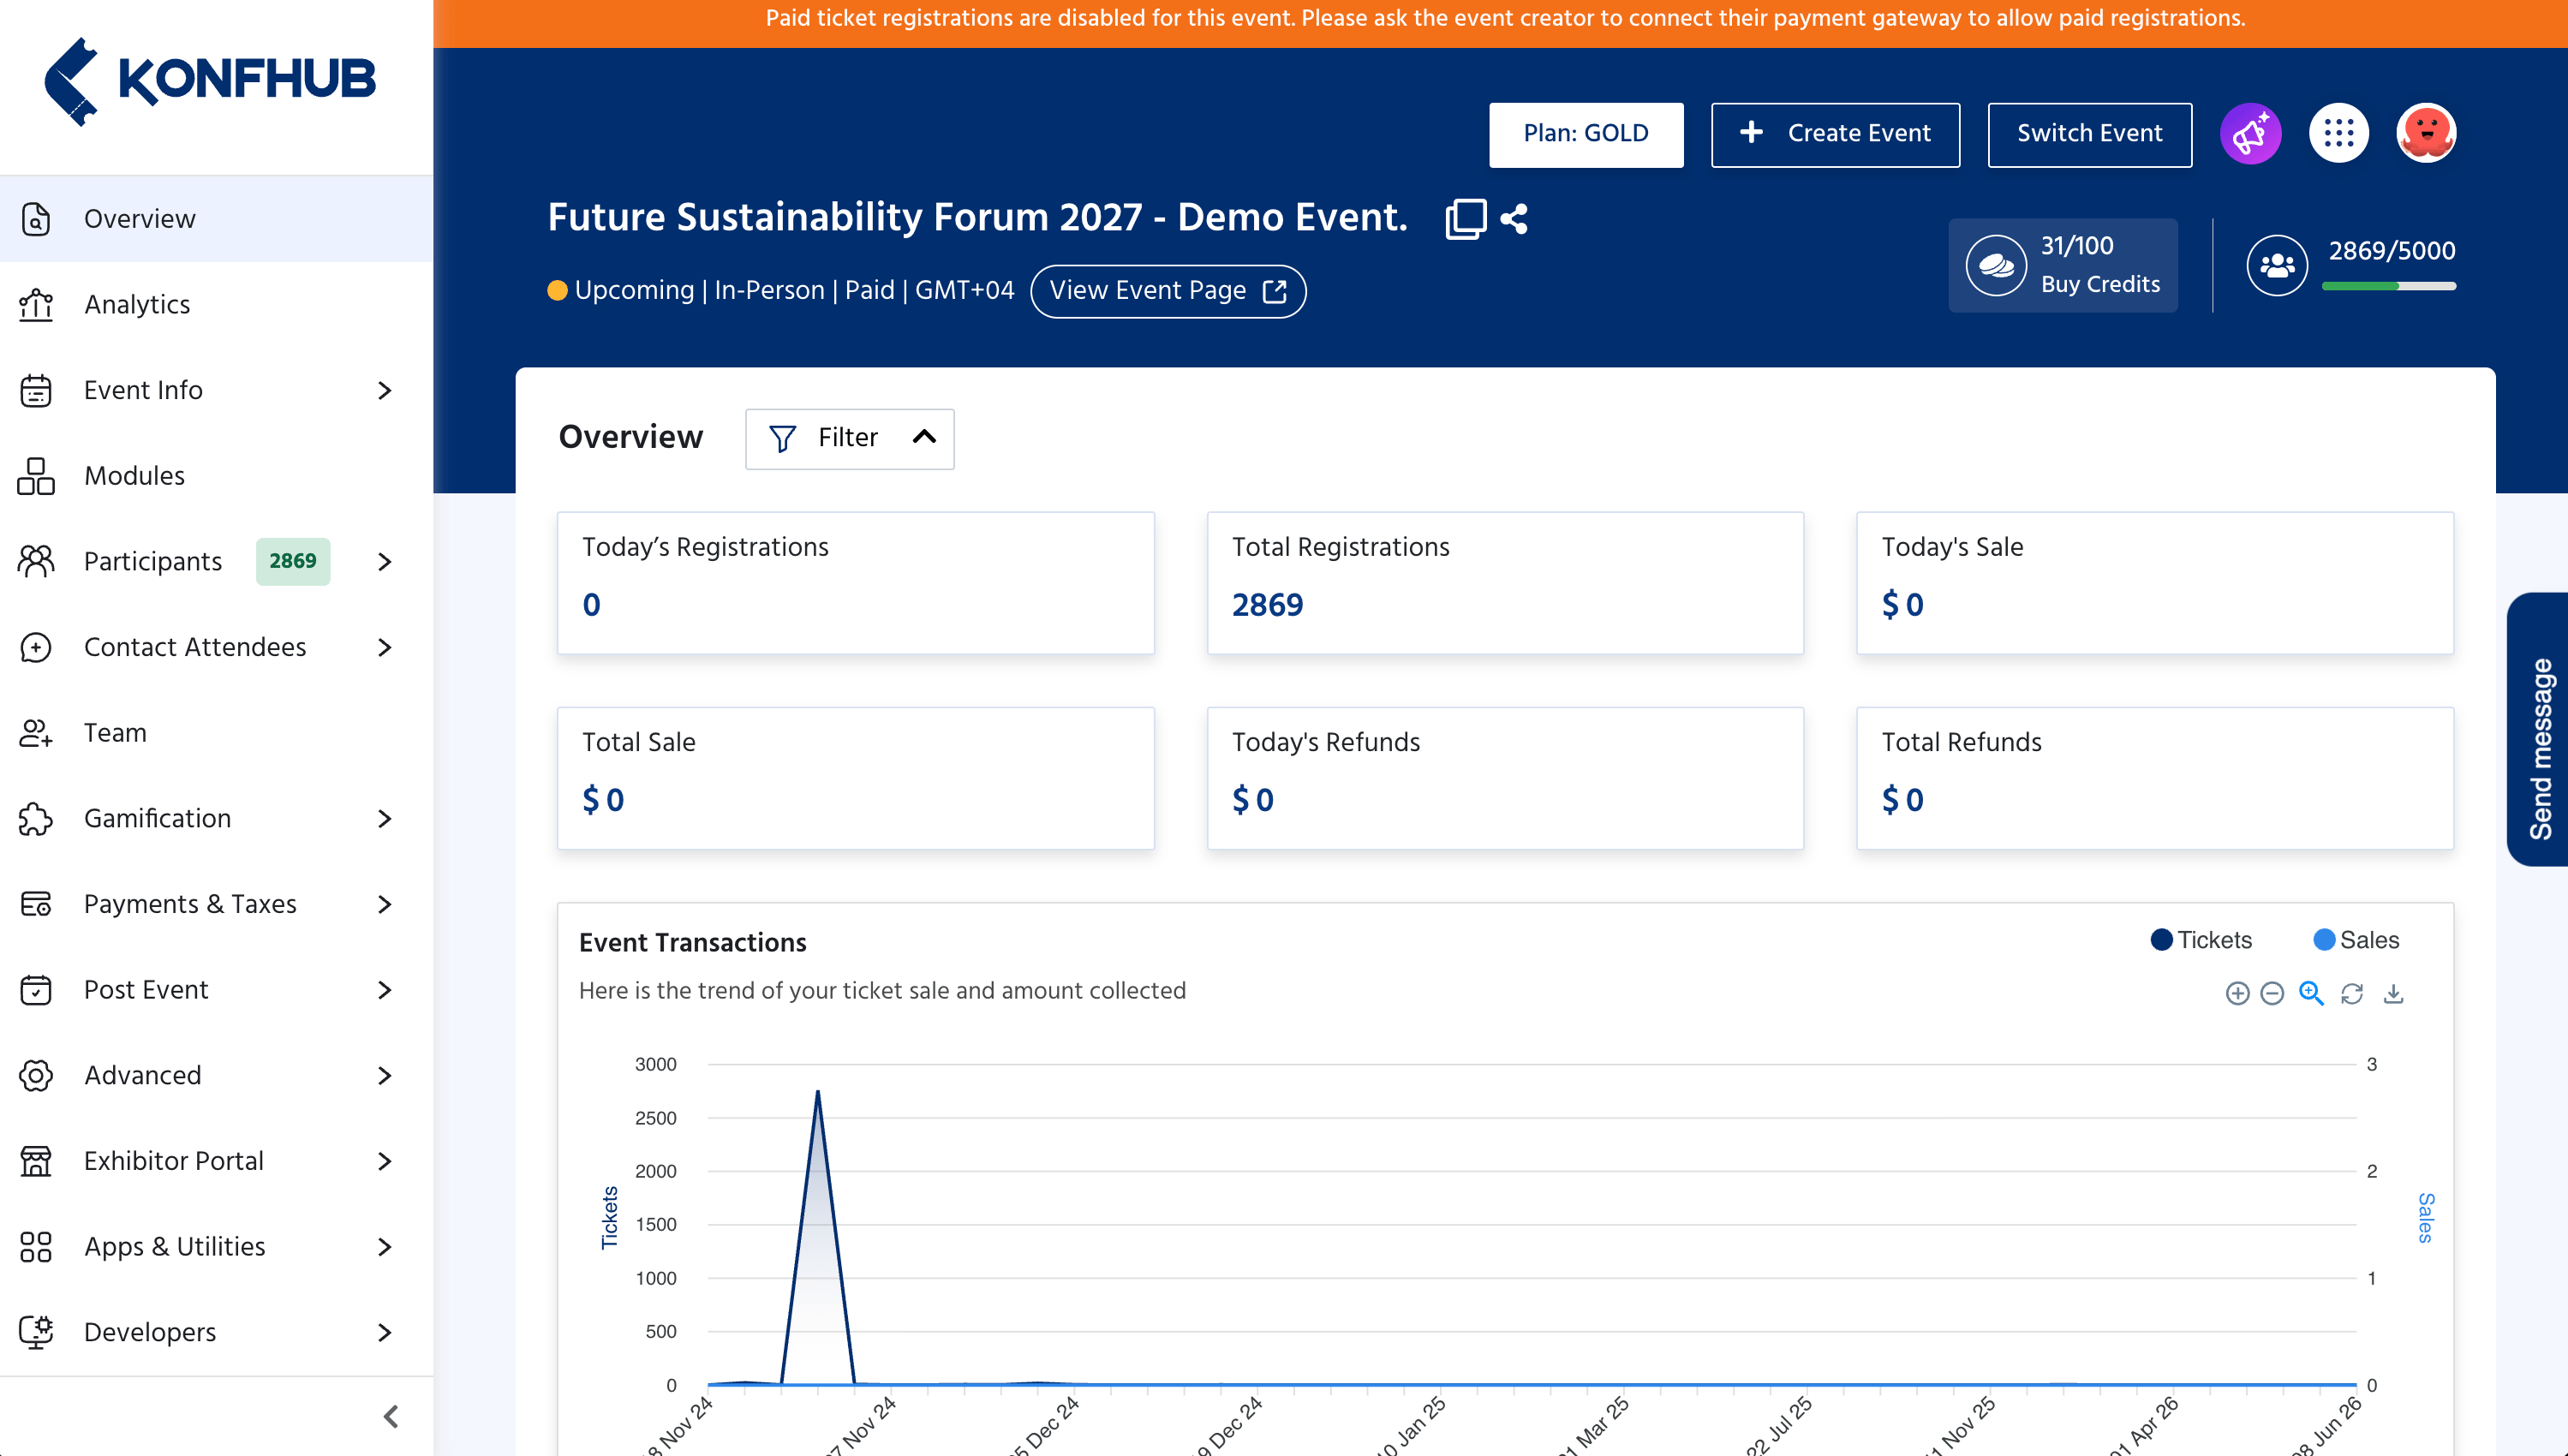 From here you can:
* Add your event description, banner, agenda, and speakers under **Event Info**
* Set up ticket types and pricing
* Configure your registration form
* Manage participants, team members, and communications
* Access apps, integrations, and advanced settings
Your event is created in draft mode by default. It won't be visible to the public until you publish it. Take your time to set everything up before going live.
***
## Next Steps
Now that your event is created, explore the Event Dashboard to complete your setup:
Get familiar with your event dashboard - registrations, sales, and activity at a glance.
Add your event description, banner image, venue details, agenda, and speakers.
View and manage your registered attendees, approvals, and waitlist.\\
Send email campaigns, WhatsApp messages, and SMS to your registered participants.
From here you can:
* Add your event description, banner, agenda, and speakers under **Event Info**
* Set up ticket types and pricing
* Configure your registration form
* Manage participants, team members, and communications
* Access apps, integrations, and advanced settings
Your event is created in draft mode by default. It won't be visible to the public until you publish it. Take your time to set everything up before going live.
***
## Next Steps
Now that your event is created, explore the Event Dashboard to complete your setup:
Get familiar with your event dashboard - registrations, sales, and activity at a glance.
Add your event description, banner image, venue details, agenda, and speakers.
View and manage your registered attendees, approvals, and waitlist.\\
Send email campaigns, WhatsApp messages, and SMS to your registered participants.