> ## Documentation Index
> Fetch the complete documentation index at: https://help.konfhub.com/llms.txt
> Use this file to discover all available pages before exploring further.

# KonfHub Registration API, Button, and Widget Integration

> Embed KonfHub registrations directly on your website using the Registration API, a hosted Registration Button, or a full-featured Ticketing Widget.

KonfHub gives you three distinct ways to bring the registration experience onto your own website — each suited to a different level of technical investment and event type. The **Registration API** lets you build a fully custom UI powered by KonfHub's backend. The **Registration Button** embeds a one-click registration flow without any redirection. The **Ticketing Widget** drops a complete ticketing interface — including payments — directly into any web page. All three options are accessible from your event dashboard under the **Developers** section.

***

## Registration API

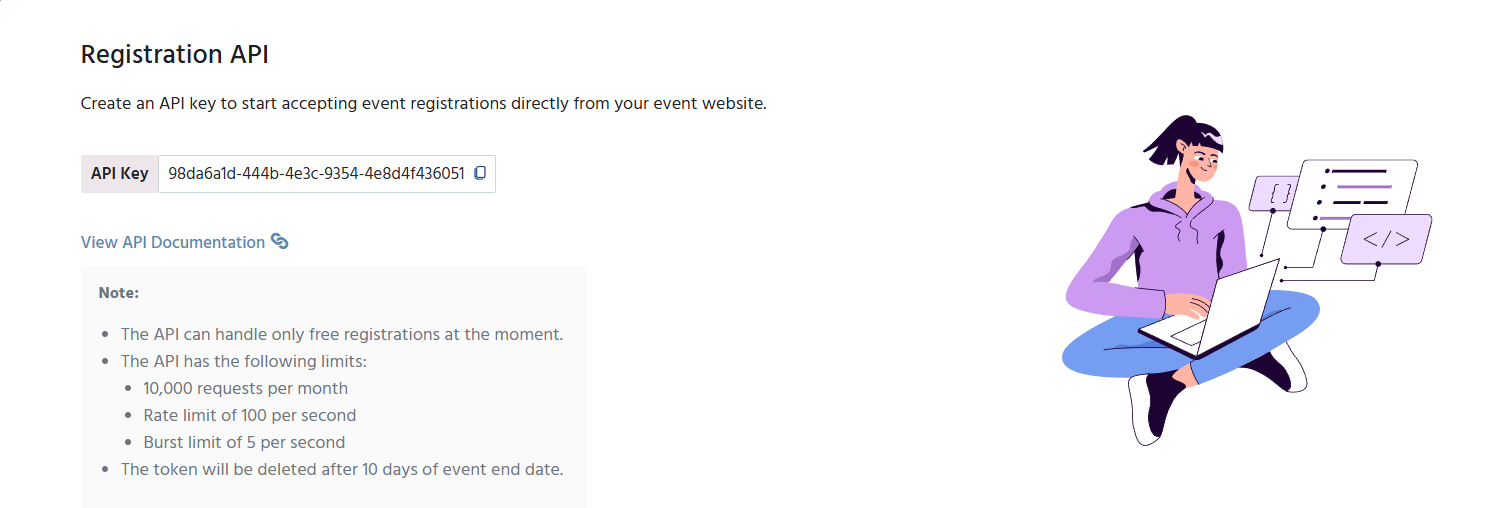
The Registration API is a suite of REST endpoints that let you build a completely custom, branded registration experience on your own website while KonfHub handles the underlying registration logic, confirmation emails, and attendee management.

### What It Does

Instead of directing attendees to a KonfHub-hosted event page, you call the Registration API from your own frontend to render a form, collect attendee details, and complete the registration — all within your site's design and brand identity. KonfHub handles the heavy lifting: ticket inventory, confirmation emails, QR code generation, and attendee record management.

<Frame>
  <img src="https://mintcdn.com/khum/XfmUU_H4fm7gP9aL/images/Screenshot-2026-06-26-162124.png?fit=max&auto=format&n=XfmUU_H4fm7gP9aL&q=85&s=496dc46aa27ec8178da8acd93c3b6a56" alt="Screenshot 2026 06 26 162124" width="1489" height="508" data-path="images/Screenshot-2026-06-26-162124.png" />
</Frame>

### Supported Registration Types

<CardGroup cols={3}>
  <Card title="Regular Registration" icon="user-check">
    Standard sign-up flow where attendees register and immediately receive confirmation and their ticket.
  </Card>

  <Card title="Waitlist Registration" icon="list-ol">
    Attendees join a waitlist when capacity is full. Confirmations are issued as spots open up.
  </Card>

  <Card title="Approval-Based Registration" icon="user-shield">
    Registrations are held for organizer review. Attendees are confirmed or rejected manually.
  </Card>
</CardGroup>

### How to Access

<Steps>
  <Step title="Open Your Event Dashboard">
    Log in to KonfHub and navigate to the event for which you want to enable the API.
  </Step>

  <Step title="Go to the Developers Section">
    In the left-hand sidebar of your event dashboard, click **Developers**. This section contains your API credentials, endpoint documentation, and code examples.
  </Step>

  <Step title="Copy Your API Key and Endpoint Details">
    Copy the event-specific API key and the relevant endpoint URLs. Use these in your server-side integration to authenticate requests.
  </Step>

  <Step title="Build Your Custom UI">
    Use the endpoint documentation to render your registration form, validate inputs, and submit registration data via secure API calls from your backend.
  </Step>
</Steps>

<Warning>
  The Registration API is exclusively available for **free events**. It cannot be used for paid events because paid ticket flows require a UI element provided directly by the payment gateway (such as a Razorpay checkout page). For paid events, use the Registration Button or Ticketing Widget instead.
</Warning>

***

## Registration Button

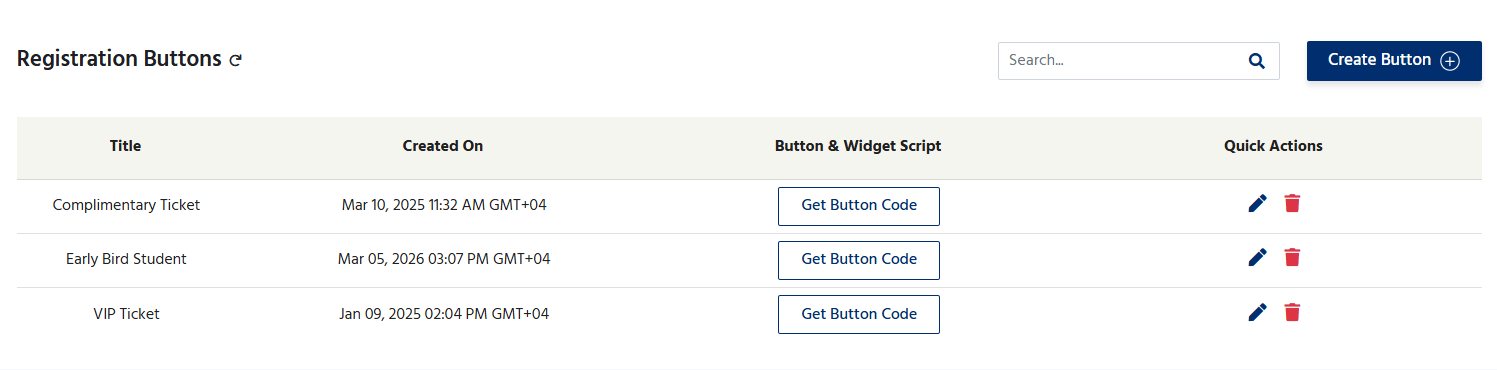
The Registration Button is the simplest way to embed KonfHub registration on your website. Attendees click the button on your page, and the entire KonfHub registration flow opens in a modal overlay — no page redirect, no leaving your site.

<Frame>
  <img src="https://mintcdn.com/khum/XfmUU_H4fm7gP9aL/images/Screenshot-2026-06-26-162420.png?fit=max&auto=format&n=XfmUU_H4fm7gP9aL&q=85&s=30b32745b773841cae51b92dec24be15" alt="Screenshot 2026 06 26 162420" width="1497" height="370" data-path="images/Screenshot-2026-06-26-162420.png" />
</Frame>

### What It Does

When an attendee clicks the embedded button, KonfHub's registration interface appears as an overlay on top of your existing page. The attendee completes registration, receives confirmation, and is done — all without ever navigating away from your website. This keeps your branding front and center and reduces drop-off caused by page transitions.

### Key Features

* Works for both **free and paid events**
* No redirection to the KonfHub website
* Entire registration and payment flow handled inside the modal
* Simple copy-paste installation — no backend required
* Customizable button label and styling

### How to Embed the Button

<Steps>
  <Step title="Navigate to the Developers Section">
    In your event dashboard, go to **Developers** → **Registration Button**.
  </Step>

  <Step title="Copy the Code Snippet">
    KonfHub generates a ready-to-use code snippet for your event. Click **Copy** to copy it to your clipboard.
  </Step>

  <Step title="Paste Into Your Web Page">
    Paste the snippet into your website's HTML at the location where you want the button to appear. No additional configuration is required.
  </Step>
</Steps>

### Example Code Snippet

The snippet KonfHub provides looks similar to the following. Your actual snippet will contain your unique event ID and configuration parameters.

```html theme={null}
<!-- KonfHub Registration Button -->
<div id="konfhub-register-btn"></div>
<script>
  (function(k, o, n, f, h, u, b) {
    k['KonfHubObject'] = h;
    k[h] = k[h] || function() {
      (k[h].q = k[h].q || []).push(arguments);
    };
    u = o.createElement(n);
    u.async = 1;
    u.src = f;
    b = o.getElementsByTagName(n)[0];
    b.parentNode.insertBefore(u, b);
  })(window, document, 'script', 'https://events.konfhub.com/embed/button.js', 'kh');

  kh('init', {
    eventId: 'YOUR_EVENT_ID',
    containerId: 'konfhub-register-btn',
    buttonText: 'Register Now',
    buttonColor: '#FF6600'
  });
</script>
```

<Tip>
  You can customize the button label and color to match your website's design. Refer to the **Developers** section in your dashboard for the full list of configuration options available for your event.
</Tip>

***

## Ticketing Widget

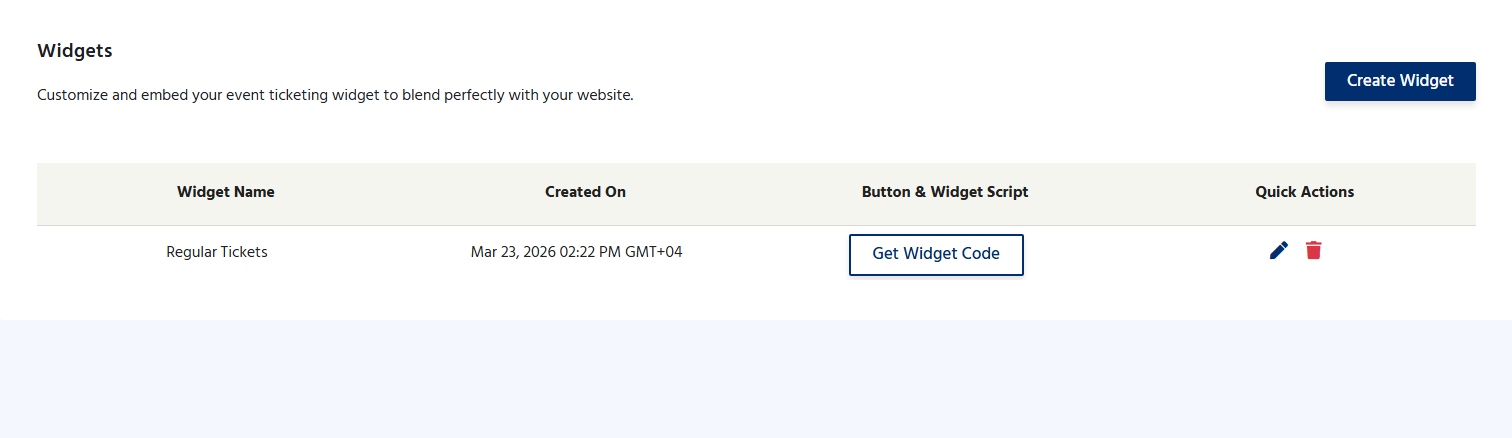
The Ticketing Widget embeds a fully interactive ticket purchasing interface directly on your web page — giving attendees a seamless, on-brand experience without ever leaving your site.

### What It Does

Unlike the Registration Button (which opens a modal), the Ticketing Widget renders inline on your page as a persistent component. Attendees can browse ticket categories, enter discount or access codes, complete payment, and receive their confirmation — all within the widget embedded on your site. This creates the most cohesive branded experience of the three embedding options.

<Frame>
  <img src="https://mintcdn.com/khum/XfmUU_H4fm7gP9aL/images/Screenshot-2026-06-26-162539.png?fit=max&auto=format&n=XfmUU_H4fm7gP9aL&q=85&s=48e51462accc67f37ae2426a650d9f0c" alt="Screenshot 2026 06 26 162539" width="1512" height="438" data-path="images/Screenshot-2026-06-26-162539.png" />
</Frame>

### Supported Features

* Multiple **ticket categories** displayed side by side
* **Discount codes** and **access codes** applied inline
* Full **payment processing** (credit/debit card, UPI, net banking, and more)
* Automatic confirmation email and QR code delivery
* Responsive design that adapts to your page layout

### How to Embed the Widget

<Steps>
  <Step title="Navigate to the Developers Section">
    In your event dashboard, go to **Developers** → **Ticketing Widget**.

    Set up the Widget by Selecting the tickets & customization and click on save.
  </Step>

  <Step title="Copy the Embed Snippet">
    KonfHub generates a unique embed snippet for your event. Click **Copy** to copy it to your clipboard.
  </Step>

  <Step title="Paste Into Your Web Page">
    Add the snippet to your website's HTML at the location where you want the widget to appear. The widget will render within the container you specify.
  </Step>

  <Step title="Adjust the Container Width">
    The widget is responsive, but you can control its width by adjusting the containing `<div>` dimensions in your page's CSS to match your layout.
  </Step>
</Steps>

### Example Code Snippet

```html theme={null}
<!-- KonfHub Ticketing Widget -->
<div id="konfhub-widget"></div>
<script>
  (function(k, o, n, f, h, u, b) {
    k['KonfHubObject'] = h;
    k[h] = k[h] || function() {
      (k[h].q = k[h].q || []).push(arguments);
    };
    u = o.createElement(n);
    u.async = 1;
    u.src = f;
    b = o.getElementsByTagName(n)[0];
    b.parentNode.insertBefore(u, b);
  })(window, document, 'script', 'https://events.konfhub.com/embed/widget.js', 'kh');

  kh('init', {
    eventId: 'YOUR_EVENT_ID',
    containerId: 'konfhub-widget',
    theme: 'light'
  });
</script>
```

<Note>
  The Ticketing Widget and Registration Button are available on the **Silver plan and above**. The Registration API is available on all plans for free events. Visit your event dashboard → Developers section to access the code snippets for your specific event.
</Note>

***

## Choosing the Right Option

<Accordion title="When should I use the Registration API?">
  Use the Registration API when you need a **fully custom UI** that is indistinguishable from the rest of your website. This approach requires frontend and backend development effort but gives you complete control over the look, feel, and flow of registration. It is only available for **free events**.
</Accordion>

<Accordion title="When should I use the Registration Button?">
  Use the Registration Button when you want a **quick, low-effort integration** that works for both free and paid events. A single copy-paste installs a button that handles the entire flow in a modal overlay. Ideal for landing pages, blog posts, and event announcement pages.
</Accordion>

<Accordion title="When should I use the Ticketing Widget?">
  Use the Ticketing Widget when you want the **most immersive on-page experience** — particularly for paid events with multiple ticket categories. The widget renders inline rather than in a modal, making it ideal for dedicated event pages on your own website where you want attendees to stay fully engaged with your brand.
</Accordion>